Showing posts with label Decoupage. Show all posts

Saturday, November 14, 2020

MDF tray decoupage tutorial

 Hello crafty friends,

Wishing you all a very happy Diwali. How about decorating a tray for this festive season. Here I share the process steps of decorating MDF tray using chalk paints for craftgully team.


Materials Required:
* MDF tray
* Creative Genie Chalk Paint - Lime Green , Summer Sky , Fresh Butter
* Modpodge / any decoupage glue
* Stencil
* White Gesso


Here are the steps in brief:
1: First sand the tray with sandpaper
2: Apply a coat of white gesso /primer over the tray.
3: Draw the design on the tray with pencil and then paint the tray with Chalk paints - i have used Summer sky, Lime Green & Fresh butter
4: Allow it to dry completely
5: Add stencil designs / rice papers / decoupage papers
6: Apply a coat of modpodge / decoupage glue to adhere it to the tray
7: Dry it with a heat gun and then decorate it with flat silver bindi 
8. Finish the process by applying any wood varnish for waterproofing

Here is the video tutorial of MDF tray decoupage


We look forward to what you create with our chalk paints

Hope you enjoyed the process of decorating the MDF tray.
 
Happy Crafting!!

Thursday, November 12, 2020

Mixed media art journaling with rice papers

Hello crafty Friends,

I am here today to share a video tutorial on a mixed media art journal page using rice papers from ITD collection for DIY blog

Materials required: 

* Art Journal book
* ITD Collection Evening meadow rice paper
* ITD Collection Brick Stencil  
* White gesso
* Texture paste 
* Chalk paints
* Sentiment
* Enamel paint


VIDEO-TUTORIAL 
Welcome to video: 

***

Close up clicks


You can add more variations to each of the pages

Thank you for stopping by!  

If you liked this card and want some more crafty inspiration, don't forget to check out my INSTAGRAM feed!


Happy Crafting
Shylaashree

Saturday, July 18, 2020

Bottle decoupage tutorial

Welcome

I am here today to share a video tutorial of upcycling of glass bottle by decoupage method with crackle finish using rice paper of ITD Collection for DIY blog


Materials required: 

* "Papier-ryzowy-decoupage-tla-papier-ryzowy"  ITD COLLECTION),
* Glass Bottle
* Crackle medium
*Black gesso or Primer
*Sponge 
*Chalk Paint or Acrylic Paint(dark & light shade)
* Handmade flowers
* Die cuts
* Jute
* Chipboard
* Glue
*  Scissor
* Flat paint brush

Step by step method:

Step 1:The first step is to clean the bottle with sand paper so that there’s no adhesives left from labels.
Step 2: I primed the entire surface of my bottle with black gesso with sponge brush. Then let it dry completely i used heating tool for quick drying, ensure that you keep the heating tool a bit away from bottle.
Step 3: Next step is to add chalk paints. Apply the dark colour and dry it thoroughly.
Step 4: Apply the crackle medium over the bottle in single pattern in one direction(either vertical or horizontal). Do add too much of the medium as it creates drops on the bottle which are subject to peel off later. 
Step 5: Allow it to dry thoroughly. Then apply the light color chalk paint in the same direction as above.You can see the cracks developing on the bottle. Again dry it up thoroughly.
Step 6. Cut the rice paper motifs with scissors and glue the motifs one by one over the bottle.
Step 7: Decorate the bottle with flowers, threads etc.
Step 8: The final step is to varnish and allow it to dry naturally for 24 hours.

Welcome to video: 


***
Close up clicks


This will be perfect home decor and great recycling idea.


Hope you like it.

Happy Crafting
Shylaashree

Friday, April 24, 2020

Video tutorial - Decoupage for beginners

Hello everyone,
I am Shylaa here to share a video-tutorial on DIY decoupage on a MDF coaster.


Materials required: 
- MDF Coaster set
- ITD Collection A3 Decoupage rice papers
- White Gesso
- Sponge brush
- Acrylic paint
- Sand paper
-Varnish

Method:

1.Take the rice paper and mark the outline shape of the coaster and cut it with scissors
2.Prime the MDF coasters with white gesso and allow it to dry.
3.The next step is to apply a very thin layer of Decoupage glue (you can also try with Modpodge, gel medium, or any PVA glue)and lay the rice paper and press it cardstock so that no air bubbles are present in between.
4.Allow it to dry for 15 mins and then sand the sides of the coaster with fine grain sanding paper to remove the excess paper.
5.The next step is to paint the backside and edges with Folkart acrylic paint. (You can also add stencils or foils if you wish)
6.Once it dries completely, add some metallic waxes over the edges for additional highlight.
7.Then add multiple coats of varnish over it to seal. (use wooden varnish for a better life)


Video tutorial


Close ups


Hope you like it.

Happy Crafting
Shylaashree

Wednesday, July 24, 2019

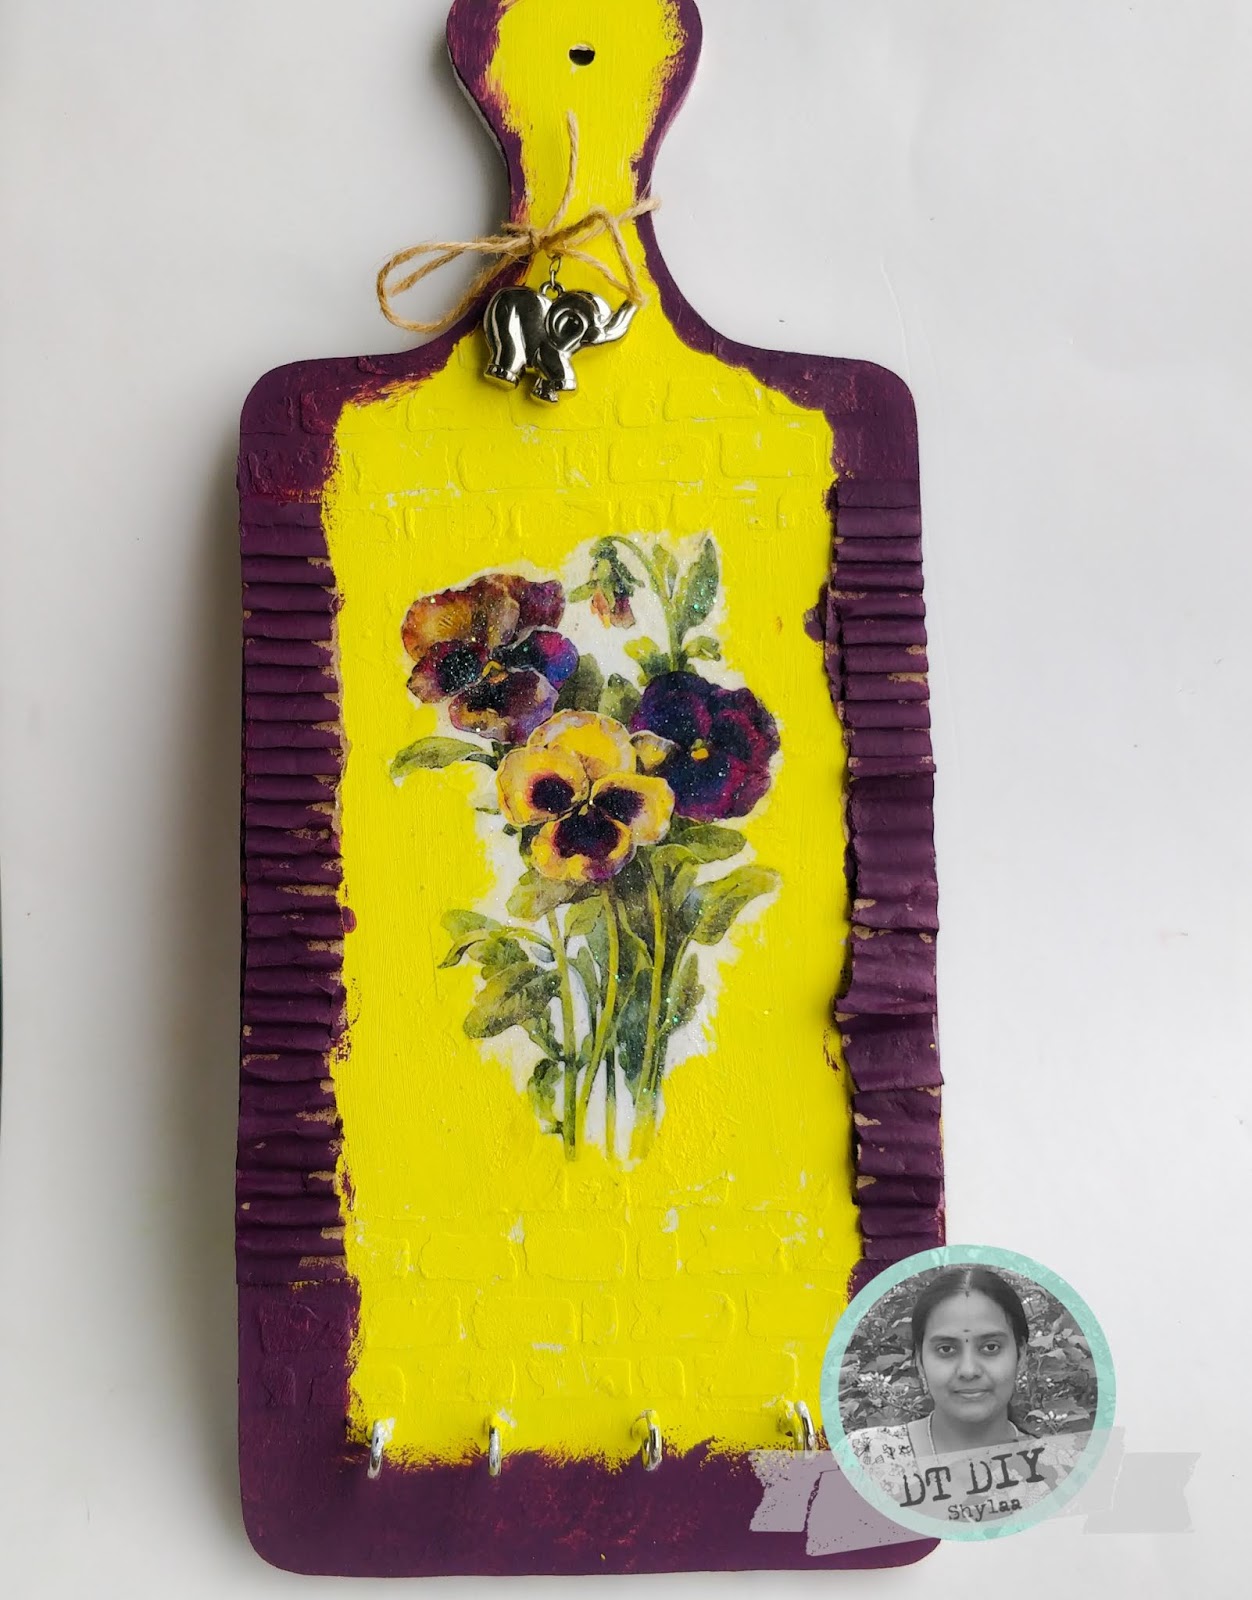
Video Tutorial Decoupage key holder

Hello everyone
I am here to share a video-tutorial on DIY decoupage on a MDF key holder for DIY Zrob tosam blog.

A personalised key holder is beautiful to have and here is the video tutorial to make it.
Materials required: 

- MDF key holder - 1no
- ITD Collection Decoupage papers
- Crackle Paste
- Sponge brush
- Chalk paints
- Gel Medium
- Glitters
- Varnish

Method:
1. Clean the surface of the MDF key holder.

2.Apply a coat of white gesso.

3. Add textures using brick stencil and texture paste.

4. Mix the chalk paint and crackle paste and apply the chalk paints over it

5. Pierce the portion of the image which you wanted to decoupage on the MDF.

6. Apply a coat of gel Medium over the MDF and carefully place the image over it. Ensure that no air bubbles are there while placing the paper over the MDF.

7. Then apply a coat of gel medium over it. Before it dries sprinkle some glitters and allow it to dry.

8.Add the corrugated paper to the sides and add grape colour to the sides.

9. Allow it to dry and seal it with varnish

Video tutorial

Some close ups


Hope you like it.


Happy Crafting

Shylaashree

Wednesday, April 17, 2019

DIY Decoupage on altered box

Hello everyone,

Missing my crafting nowadays.

Today I share video tutorial of DIY decoupage of an altered box into Easter gift box from materials of ITD Collection.


Materials required

*  rice paper with hare from ITD Collection
* Small candy box
* White primer / IMMIX white gesso
* IMMIX Chalk paint - Maya Blue & Tiffany Blue
* glue to decoupage
* Sponge brush
* IMMIX Gel Medium
* IMMIX Rainbow Glitters
* Walnut stain Distress ink
* Varnish


Method:

1. Take a box which you want to decoupage and clean it well.

2. Apply a coat of white gesso/white primer over it and allow it to dry
3. Then take the IMMIX chalk paints and apply two coats over the box and allow it to dry.
4. Select the image from the rice paper and cut it with scissors. Slightly wet the edges with water and peel the edges
5.Now apply a coat of IMMIX gel Medium / decoupage glue over the surface of the box and carefully place the image over it. Ensure that no air bubbles are there while placing the rice paper over the box and apply a decoupage glue / gel medium over it. Then sprinkle some IMMIX rainbow glitters over it and allow it to dry.
6. Add some distress inks over the edges to get a vintage look.
7. Seal it with varnish

Video tutorial


Hope you like it.

Easter greetings to you and all in your family.

Happy Crafting
Shylaashree

Sunday, March 24, 2019

DIY decoupage on ceramic plate tutorial

Hello everyone,
I am Shylaa here to share a video-tutorial on DIY decoupage on a ceramic plate.

Do you have old ceramic plates, take it out and decoupage it in to a beautiful decorative piece or a it could be a perfect gift.


Monday, August 20, 2018

Tutorial on Decoupage

Hello Crafters,

I am here today to share a step by step tutorial on decoupage with

This month our challenge theme is to use Chalk paints in your projects.

Today I share a video tutorial on decoupaging a bottle.


Basic Process:
1. Clean the surface of the object which you want to decoupage. Then sand it with sandpaper to get a even finish
2. Coat two layers of IMMIX chalk paint and then add decoupage papers or decorate with 3d outliners
3. Allow it to dry and coat a layer of mod podge over it.

Here are some closeups


Hope you like it!

Expressions Craft Supplies

Chalk paint
Baby Pink                  Sunset gold
 
Decoupage paper
Kerala


Challenges i enter

Altered eclectics - Anything goes

Art journal - ATG
 Creatalicious - ATG
Create and inspire - ATG
Creations in pink - ATG in pink


Happy Crafting!

Saturday, June 2, 2018

upcycling ferrero chocolate box

Hello Crafty friends,

I am here today DT inspiration for Expressions Craft blog with a upcycled chocolate box that highlights the Expressions Craft Mandala decoupage papers. This decoupage papers are of 100 gsm with a textured background. It adheres well with any base material.

Over to my box, I know you all love Ferrero chocolates. I usually store these boxes for upcycling it later. Here is my way of  recycled/up-cycled Ferrero Rocher box.


Here we go with steps of transforming the box

 Step1: I took the decoupage paper and measured it to the size of the box and removed the excess portion of it 
Step 2: I gave a coat of gesso over the box and dried it using heat gun
Step 3: I used Modpodge to stick the decoupage over it
Step 4. To the sides i applied chalk paint and then applied a coat of modpodge completely over the box.


Hope you like it
Supplies used from our store


Over to our challenge theme this month it is Anything Goes. Link your projects here.

Pls follow the guidelines before you play along with us.

 Thank you so much for stopping by

Happy Crafting

Shylaashree